Having a markup editor is essential for creatives. Without it, a photo editor, retoucher, or another creative on your team doesn’t have the ability to collaborate with their colleagues seamlessly. A markup editor takes a task that’s often tedious and time consuming and creates an opportunity for a simple, easy workflow.
Why is the markup editor important?
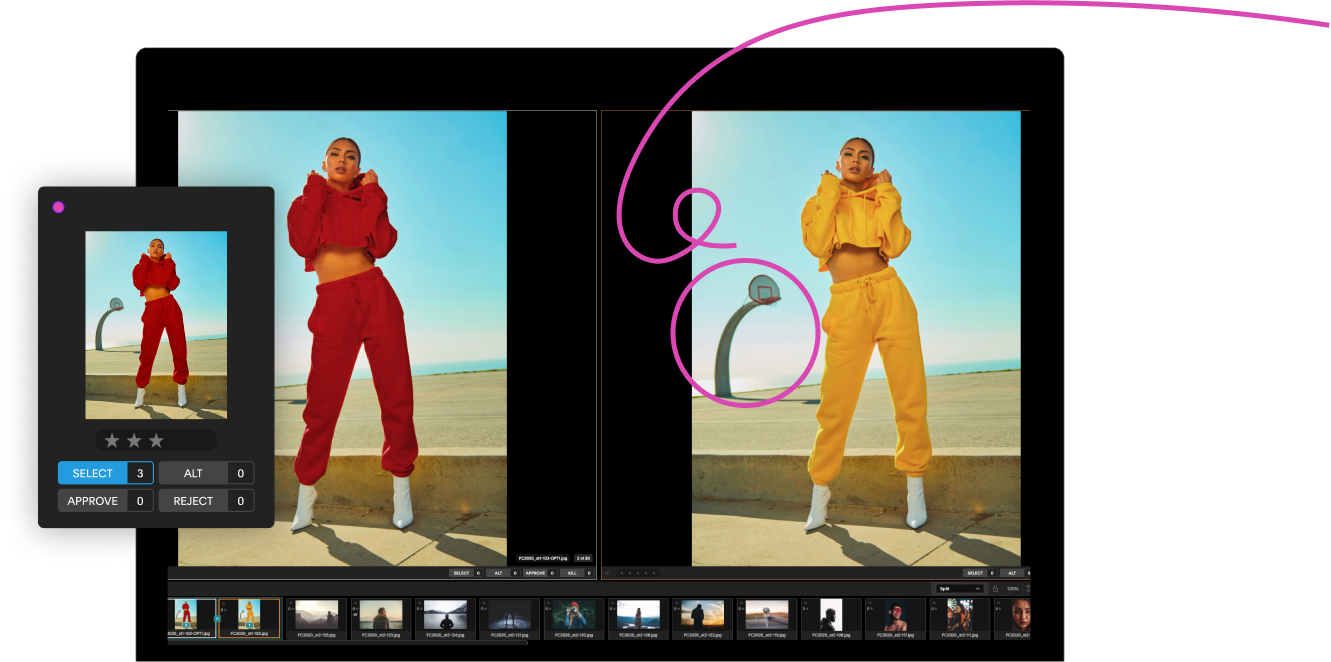
A markup editor allows you to add annotation, comments, and call-out text annotations. With globaledit, the markup editor can be easily used on both web and mobile including iOS & Android platforms. This way, you can be in sync with your creative team at the touch of a button.
How to use the markup editor:
If you’re working with globaledit, the interface provides you with an incredibly easy way to use the markup editor. While in the interface, you simply press the pen icon to enter the markup editor. Once activated, you can swipe through your team’s imported images and see current markups. You can then make your own markups in the editor by using the brush tool, comment section, or text. Once you’re finished with your work, or approved the work of others on your team, you’re done. Yes, the markup editor really is that simple to use.
How to use a markup editor as part of a team:
Whether you’re in marketing, advertising, e-commerce, or any other creative field, one thing rings true: creative work is collaborative work. Being able to access visuals from anywhere, all in one place, is something that is invaluable to a team. Within a tool like a markup editor, your team members will see your work instantly and vice versa. You can collaborate on visual projects so seamlessly that it will tremendously improve your time and efficiency.
The functionality of a markup editor:
If you’re utilizing globaledit to markup visuals, all of your markup layers can consist of multiple comments and annotations. A Text Box appears when an initial mark is made to instantly apply a comment. That comment will then apply to all marks on that layer allowing a single instruction to be delegated to multiple annotations. Comments can be changed in the text box on the image. To change a comment on a different layer, tap the layer from the markup layers pop-up window. Once a layer is chosen, a comment can be changed in the text box on the image. The pen tool allows you to freehand your marks, while shapes (circles and squares) provide increased marking precision. For example, use a square to define a desired crop or an ellipse to quickly highlight blemishes.